I had been thinking about giving one of the Gingery injection molding machines a try for a long time. I was hesitant to try because I didn't know how well it would work (I hadn't seen any of the machines online). I also didn't have a good method of creating molds for the machine. After I purchased my CNC milling machine (Sieg X3) I had a tool to produce molds of significant complexity to make it really interesting so I decided to give it a try.
Gingery publishing has two books on plastic injection molding: Plastic Injection Molding Machine and Plastic Injection Molding Attachment for the Drill Press. The first book details the construction of a full injection molding machine including the mechanism used to push the ram into the injection cylinder. The second book features a smaller machine that relies on an existing mechanism from a drill press to push the ram. Using the drill press attachment design reduces the complexity and space required for the project. For these reasons, I decided to build the drill press attachment injection molder. The temperature control for the heater is also different in the two books. The drill press attachment book uses a purchased PID controller, thermocouple and purchased cartridge heaters. I do not know the details of the other controller because I do not own the book.
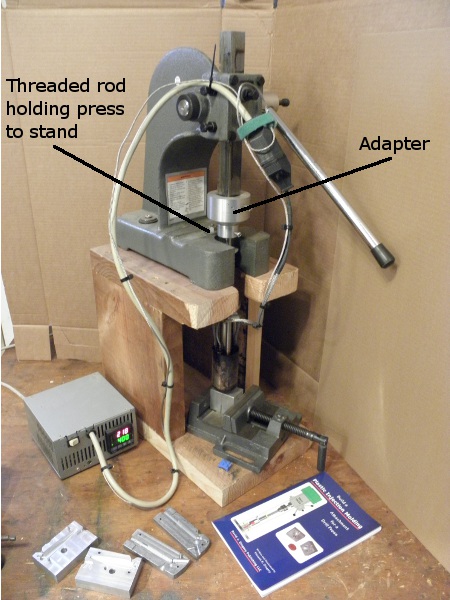
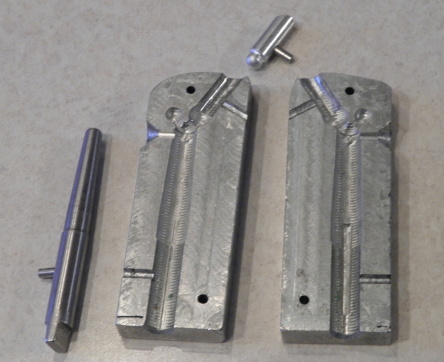
| The making of a Gingery injection molding attachment for a drill press. | |
| My first attempt at injection molding with PETE plastic (Mountain Dew bottles). The molded part is the shape of a fishing lure (crankbait). This type of fishing lure needs to have a buoyant body to keep it upright in the water. The PETE plastic used in the video is more dense than water so it is not a functional lure. |
- The injection molder attachment is designed to be used with a drill press with a spindle travel of at least 3 inches. I use a drill press stand that was originally intended for mounting a hand held drill. My drill press stand does not have a stroke of 3 inches but I found that if I set the stand height so I have to lift the injection cylinder over the mold I can still eject the last bit of plastic from the cylinder.
- In the book when the depth of holes is given the depth is to the point of the hole not the depth of the full diameter.
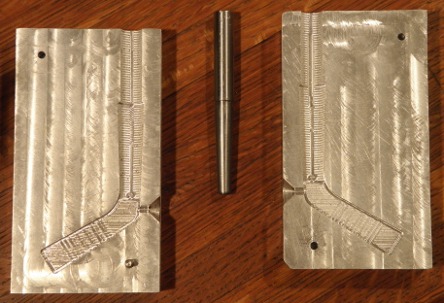
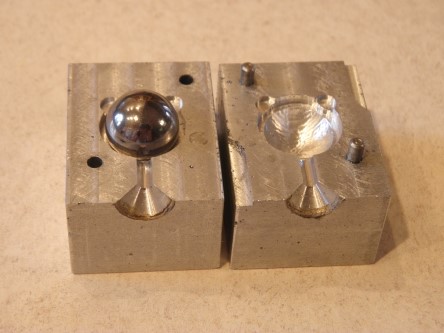
- So far I have made all of my molds out of aluminum using a CNC milling machine but the description for the injection molding machine book states that molds can be made with castable epoxy or plaster of paris. There are not any details of how to make molds out of these materials in the injection molding attachment book. The injection molding machine book may have more details (I don't know). The description of the book does say that it has instructions on how to make a knob mold (used for the adjustable table in the injection molder) and a mold that creates a small plastic container with a snap lid. These items are not in the injection molding attachment book.
- The video shows that I used a toaster oven to preheat the mold. I have found that preheating the mold is not required for the parts I have been making. All of the parts pictured on this page have been made without a preheated mold. I am guessing that for longer thinner parts preheating the mold will help prevent the plastic from hardening before the mold is filled.
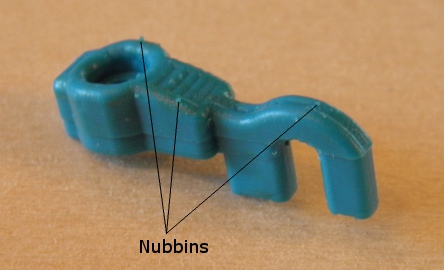
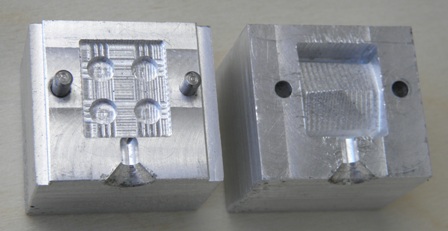
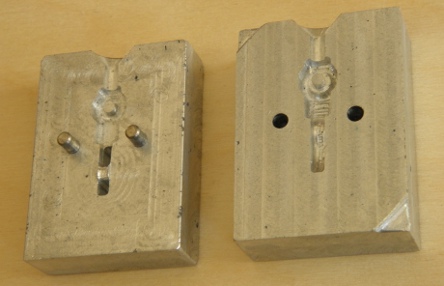
- A lot of my molds look spotted and the parts I make have little nubbins sticking out of them. The material I use for most of my molds is aluminum that I have melted and cast into billets. The billets tend to have porosity in them. When I inject the plastic into the mold the small pores in the aluminum are filled with plastic resulting in the nubbins that stick out from the plastic parts. Since I use scrap aluminum for the molds and scrap plastic for the parts all of the material I use for plastic injection molding is free.
| Code # | Abbreviation | Full Name | Notes | Example Uses |
|---|---|---|---|---|
| Polyethylene terephthalate (Polyester) | Hard and brittle (generally transparent) | Pop (soda) bottles Prescription pill containers |
||
| High-density polyethylene | Medium hardness and have a tendency to shrink during the molding process | Plastic bottles Plastic bags |
||
| Polyvinyl chloride | I would not use this because if it is over heated it off gases toxic fumes | Pipes for plumbing | ||
| Low-density polyethylene | Softer and have a tendency to shrink during the molding process | Covers for plastic containers | ||
| Polypropylene | Medium hardness Does not shrink a lot |
Peanut butter jar covers Plastic parts with a living hinge |
||
| Polystyrene | I have not tried this material | Food containers | ||
| Acrylonitrile butadiene | I have not tried this material | Computer equipment (monitors, scanners etc.) Legos |
| Molded Item | Mold | Description |
|---|---|---|
|
 |
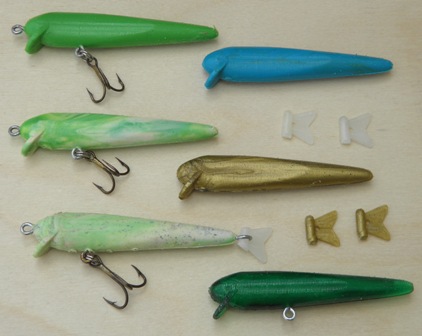
Fishing Lures. All of the lures here, except the dark green, are made from Polypropylene, which floats. The baits "swim" better than the lure in the video but they do not dive as deep as I would like. (I have not caught any fish on any of these lures.) |
  |
|
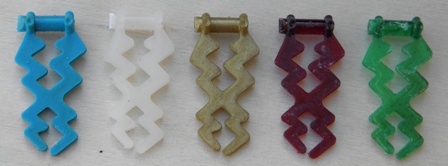
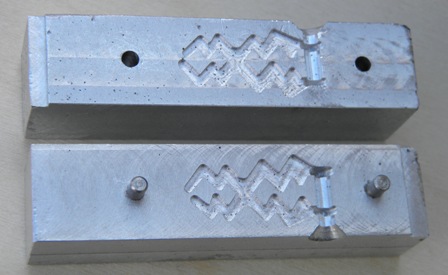
Copy of Lord Garmadon's Thunder Bolt from Lego (In my house it is referred to as Lord Garmadon's freeze gun) |
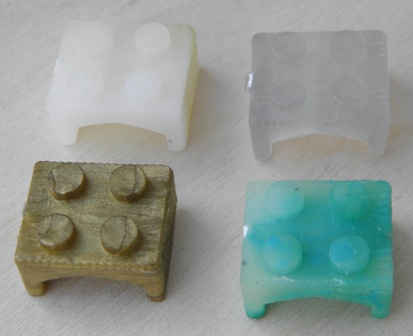 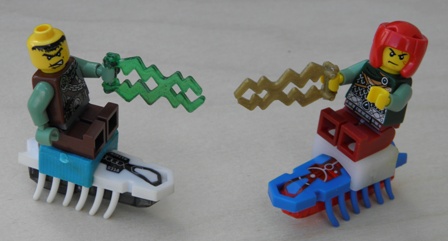 |  |
Hexbug saddle I downloaded from Thingiverse. Allows Lego minifigures to ride on Hexbugs
The model for this part is available on Thingiverse: Robot Saddle by IHeartRobotics |
  |
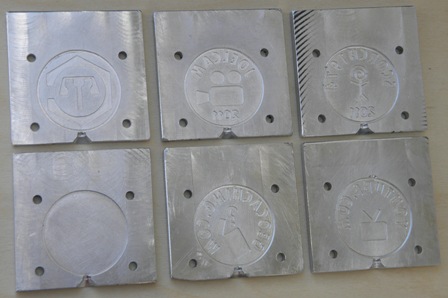 |
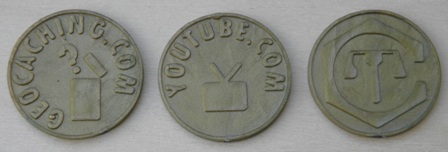
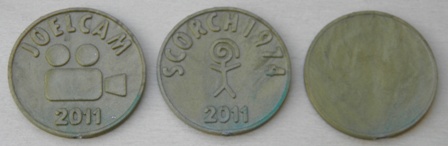
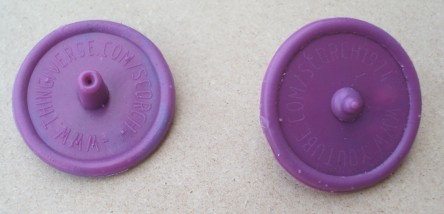
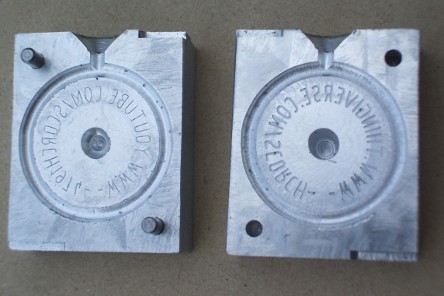
Coins with logos that I made up and one with the logo from the local hacker space
(Twin Cities Maker)
in Minneapolis. The molds for these coins were made from the bottom of an old aluminum frying pan. |
  |
 |
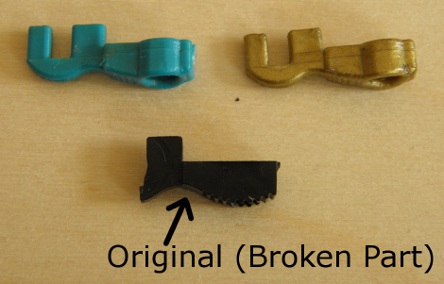
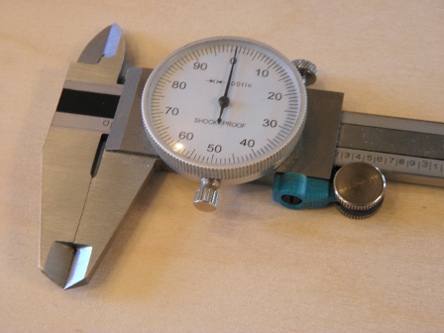
This is a replacement thumb wheel hook for one of my dial calipers. As with most of the other items so far I made this part out of polypropylene. This item is the most practical item so far. The new part works the same as the original.
The model for this part is available on Thingiverse: Thumb Roller Hook |
|
 |
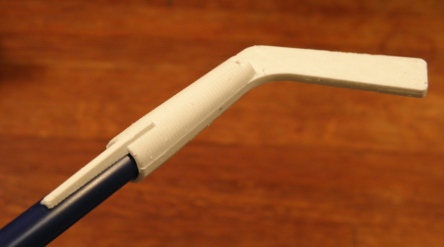
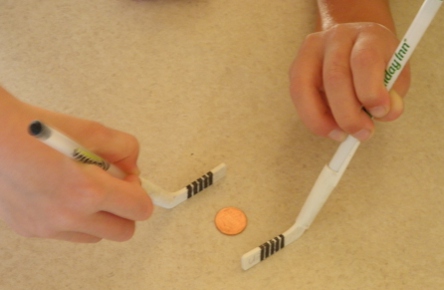
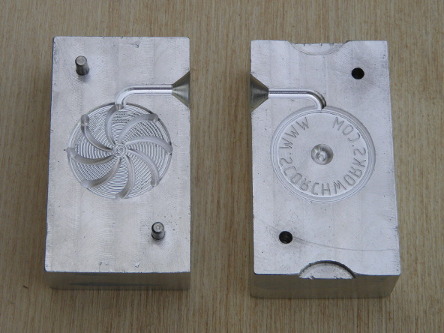
This is a play on some other items on Thingiverse that transform the typical pen cap into something different. This mold is more complex than my previous molds. This mold required a removable insert to form the inside shape of the pen cap. I used candle wax as a mold release on the removable insert. This is the first part I molded that required a mold release.
The model for this part is available on Thingiverse: Hockey Bic |
|
 |
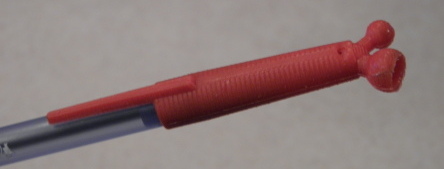
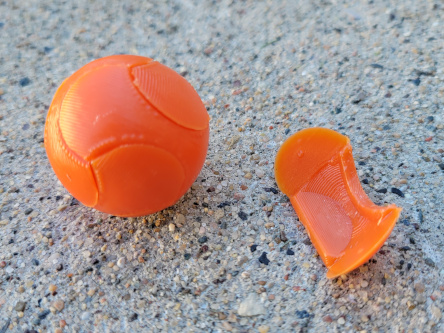
Another item that transforms a typical pen cap into something different. This mold adds yet another level of complexity. This mold required two removable inserts to form the inside shapes of the pen cap. The insert that forms the snap-in connecting feature is a bump off insert. (i.e. The injection molded plastic actually deforms when the insert is removed)
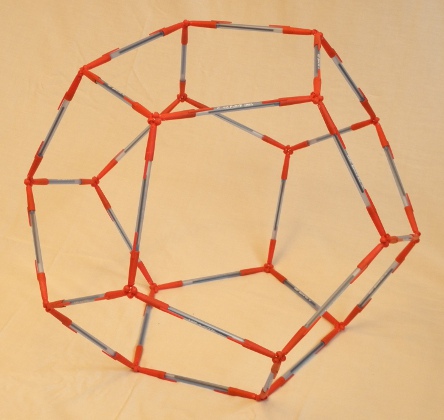
The model for this is available on Thingiverse: BICky Ball A video of the making of the pen caps parts is available on YouTube: Pen Cap Molding Video A video of geometric shapes I made is also available on YouTube: Pen Cap Geometric Shapes |
  |
 |
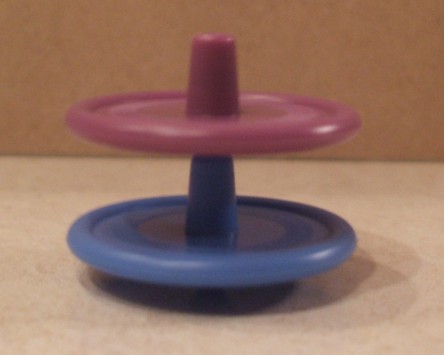
This is a simple top part that I designed. I included an indent in the top of the top so that one can be spun on top of another. I guess in theory you could stack more than two but I have not done it. I plan to use these tops as geocaching swag so you can try for yourself if you find them.
The model for this part is available on Thingiverse: Stacking Top |
 |
 |
This is a kendama pen cap that I designed. I call it a pendama. This pendama is very difficult to play. I see it as more of a novelty to look at at this point. However if you are looking for a serious challenge you can make it and try to play.
The model for this part is available on Thingiverse: Pendama |
   |
 |
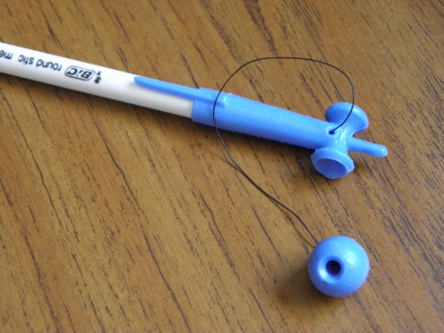
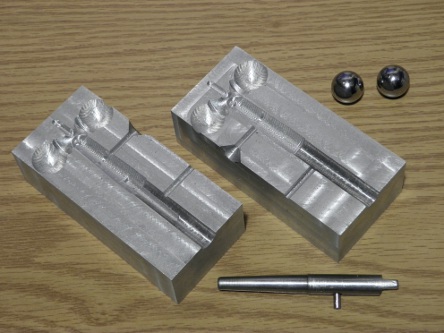
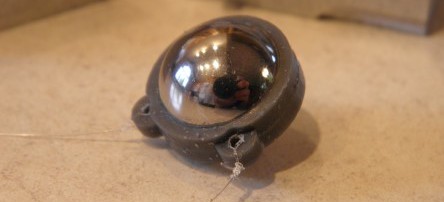
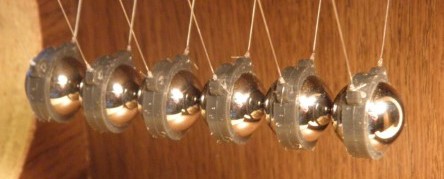
This is a part I designed for attaching strings to steel bearings for a Newton's cradle. The steel bearing is placed in the mold and the plastic part is injected around the bearing providing a placed to tie strings. |
 |
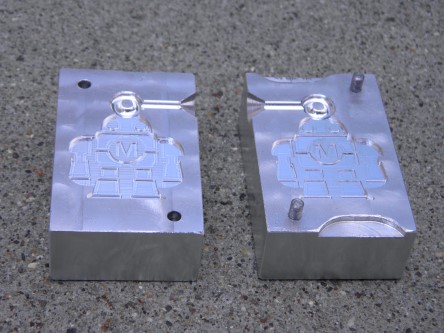 |
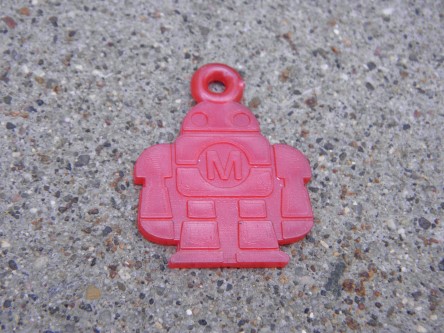
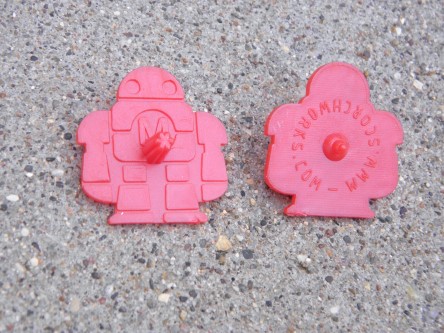
This is a little Makey (Maker Faire Mascot) fob. It can be used as a zipper pull, keychain, necklace or charm of any kind. |
 |
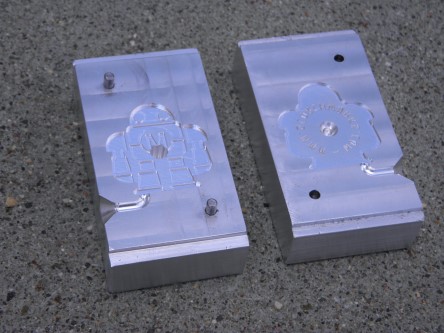 |
This is a little Makey (Maker Faire Mascot) spinning top. |
 |
 |
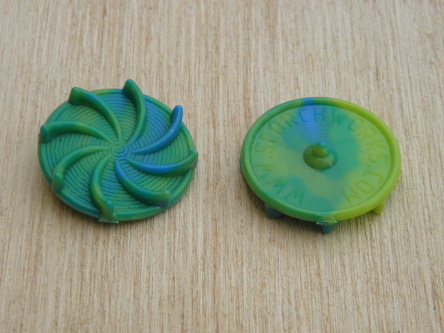
This is an air powered spinning top. To spin this top you blow on it. |
 |
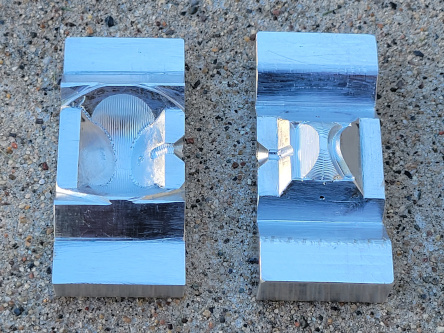 |
This is a puzzle that consists of 6 identical parts that can be assembled into a ball shape. |
 |
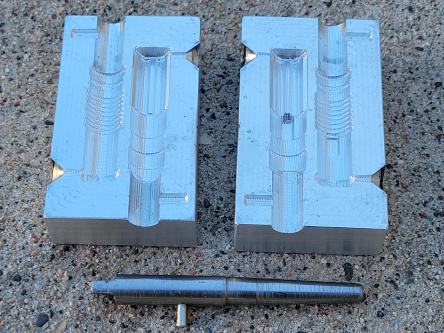 |
These are lightsaber pen caps. One is styled after Luke's lightsaber and the other is styled after Darth Vaders |