K40 Whisperer is written in python so it is possible to run it on Windows, Linux and Mac. However there are a lot of dependencies that need to be satisfied in order to successfully use the program. These dependencies are resolved on windows by packaging them in the pre-compiled executable version of K40 Whisperer. For Linux and Mac additional work will need to be performed by the user for proper installation.
Step 1. |
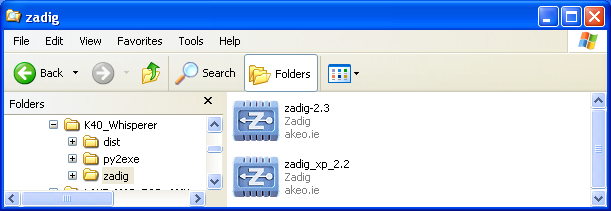
Download Zadig Download the correct version for you operating system: Zadig_XP (Windows XP, Windows Vista) Zadig (Windows 7, Windows 8, Windows 10) (Zadig will install the required USB driver for K40 Whisperer to communicate with the Laser Cutter. You can also download the latest version from Zadig) |
|
Step 2. |
Make sure your laser cutter is connected to your computer via a usb cable and
Turn on your K40 Laser Cutter |
|
Step 3. |
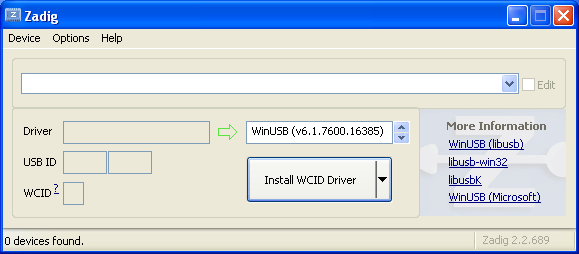
Start Zadig start Zadig by double clicking on the executable file that you downloaded in Step 1. |
|
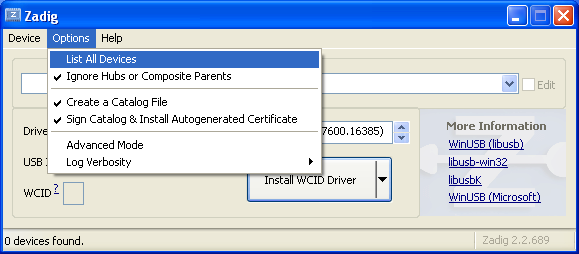
Step 4. | In Zadig select "Options" - "List All Devices" |
|
Step 5. |
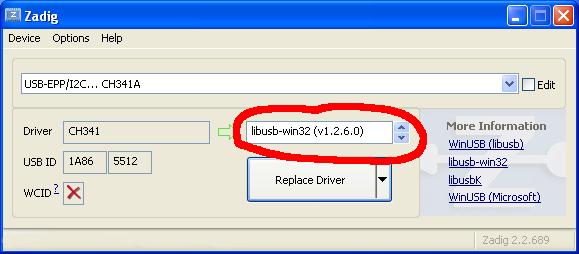
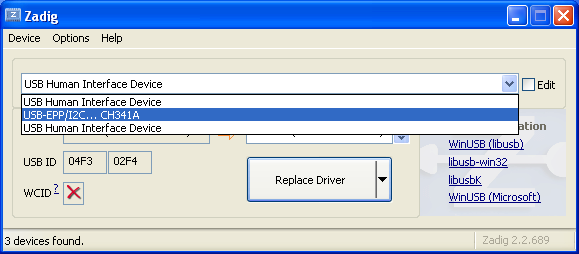
In the Zadig dropdown menu find and select the item "USB-EPP/I2C... CH341A"
If it is the first time plugging your laser cutter into the computer it may take some time for the default driver to load. The correct name will not appear in the list until after the default driver loads. |
|
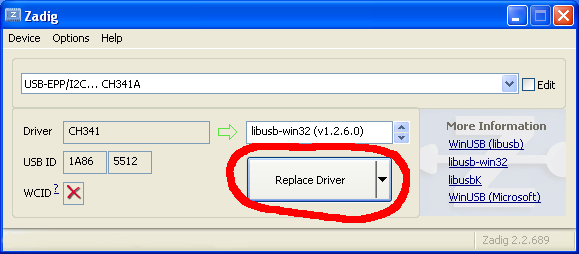
Step 6. | In Zadig change the driver selection to "libusb-win32(v1.2.6.0)" |
|
Step 7. | Decide if you are going to use option 7a. OR 7b. (Do not do both steps 7a. and 7b.) |
READ THIS STEP CAREFULLY Option 7a: This option replaces the existing driver for the laser cutter controller board. This will change your computer settings in a way that the original software for running the laser cutter will not work (unless you remove the libusb driver). The interface hardware in the controller board (CH341) is also used in other hardware (e.g. some Arduino clones). If you have other hardware that uses this chip the other hardware may also not work with the libusb driver is installed. Option 7b: This option adds a filter driver for libusb the existing driver for the Laser cutter controller board. This will add the libusb driver in a way that will allow you to use the original laser cutter software (LaserDRW or CorelLaser) and K40whisperer without removing and reinstalling drivers. This sounds great but there is a catch. When you select "Install Filter Driver" there is a scary warning that comes up. It even warns of potential "Complete System Failure". I don't know much about this warning but I gave it a shot and it worked on my system without a problem. To switch between LaserDRW and K40 Whisperer I just close one program then turn the laser off then back on and open the other program. Option 7b. may not successfully install on some windows versions. Windows XP seems to work. Windows vista,7,8,10 are all questionable. If option 7b. does not work as presented but you still want to use the filter driver you can try two other options: - Use the Windows XP version of Zadig (Some users report this worked for later versions of Windows). - Use the filter driver installer available here: libUSB-win32 |
Step 7a. |
In Zadig click on the button that says "Replace Driver"
(As mentioned before this will replace the existing driver that is installed for the selected USB hardware. After completing this step you will not be able to use the LaserDRW with your laser cutter unless you remove the libusb driver.) |
|
Step 7b. |
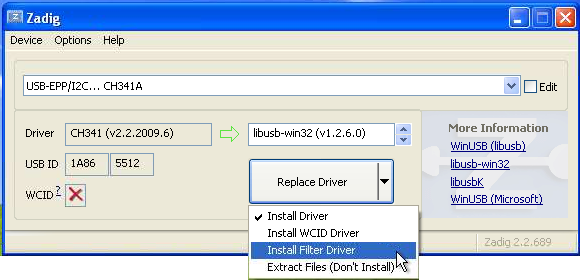
(only do this step if you skipped step 7a.) Use the drop down menu on the large button to select Install Filter Driver then click on the button now labeled Install Filter Driver to install the filter driver. (This option may not successfully install on some windows versions (i.e. windows 10). If it does not work use option 7a.) |
|
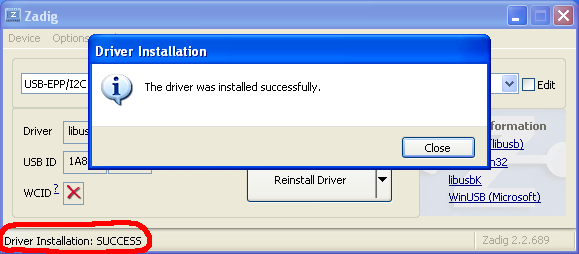
Step 8. | If you see a message indicating successful install you are done with the driver install. |
|
Step 1. |
Make sure your laser cutter is connected to your computer via a USB cable and
Turn on your K40 Laser Cutter |
|
Step 2. | Open the windows device manager. |
There are a few ways to open the Windows Device Manager. Here is a method that works for Windows XP through Windows 10: 1. Open the "Run" dialog box by pressing and holding the Windows key, then press the R key ("Run"). 2. Type devmgmt.msc 3. Click the "OK" button Instructions with pictures: Opening Device Manager |
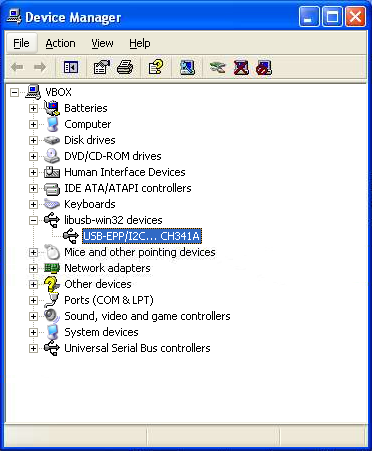
Step 3. | Locate the "USB-EPP/I2C...CH341A" device under "libUSB-win32 devices" |
|
Step 4. |
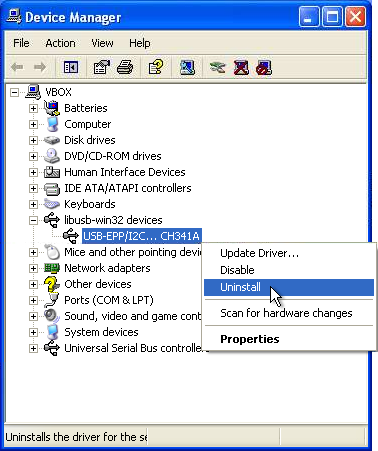
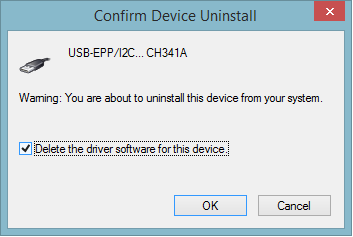
Right Click on the "USB-EPP/I2C...CH341A" device and select Unistall" from the drop down menu. After the device is removed you can turn the power off and them back on on the laser cutter. When the computer detects the laser cutter on power up the original driver will be restored and you can use the original (LaserDRW) software again. With later versions of windows (Windows 10) you may also need to check the "Delete the driver software for this device" box when removing the driver. |
Additional window in Windows 10 |
Step 5. |
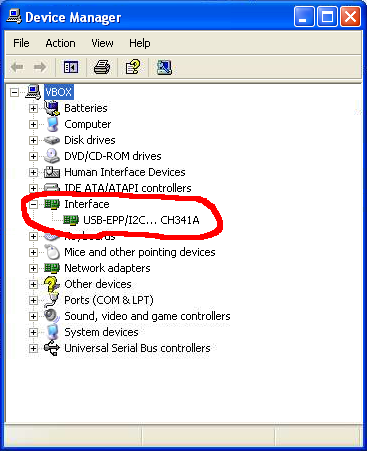
After the original driver is restored the device manager should show a "USB-EPP/I2C...CH341A" device under "Interface" |
|
Step 1. | Follow the steps 1 Though 6 above in the Install libUSB driver section. |
Windows libUSB Driver Install |
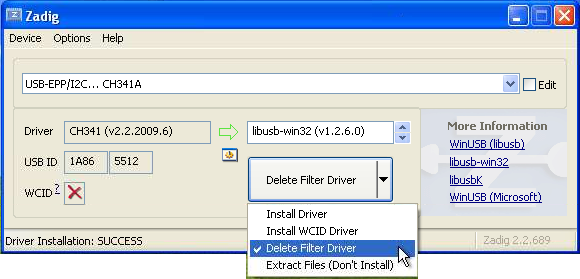
Step 1. | Use the drop down menu on the large button to select Delete Filter Driver. |
|
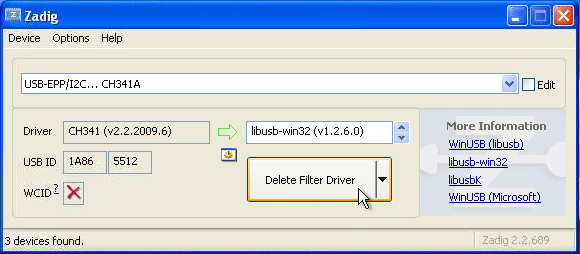
Step 2. | Click on the large button now labeled Delete Filter Driver. |
|
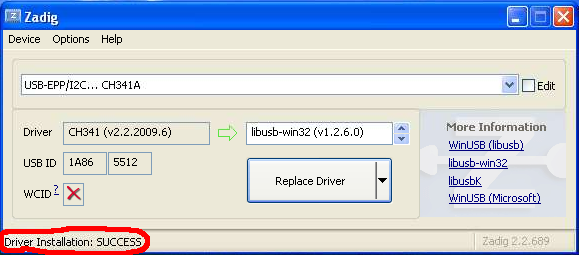
Step 3. | There should be an indication of success in the lower left corner. |
|