Scorch Works
at Maker Faire

Scorch Works Home

Description / Overview

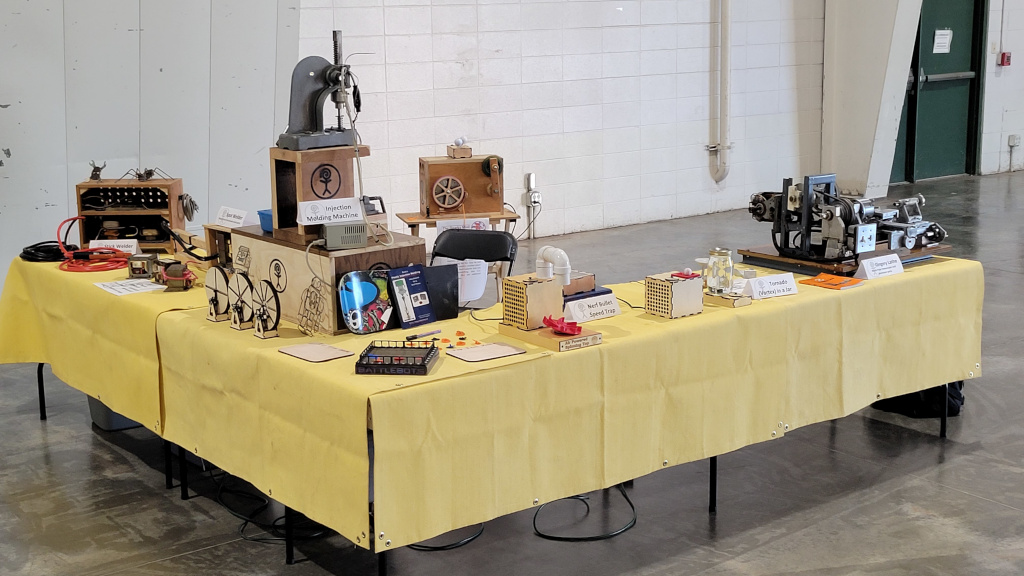
This page contains additional information about things that can be seen at my booth at various Maker Faires that I have had a booth at. I try to add new items and switch things up if I show at the same fair location more than once. Although to be honest I get the sense that Maker Faire attendees change enough from year to year that even with the same display the majority of people would be seeing it for the first time. Of course, there are exceptions, some people like me seem to keep coming back year after year.

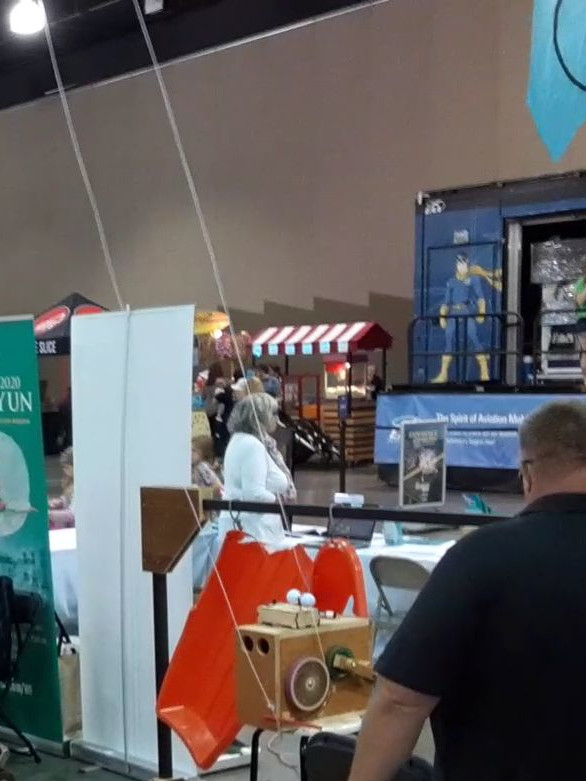
The picture below is a typical booth setup that I might have at a Maker Faire. The booth pictured is from Ozarks 2021 which was at the tail end of Covid and the booths were all separated by quite a distance.

On the left of this page there is a list of items that I have shown at Maker Faires. If you click one of the items it will bring you down to more information. Alternatively, you can just scroll through the items on the page.

setup_ozarks_2021.jpg

Cart Table

My cart table is the unsung hero of my Maker Faire booth. It is very functional but no one really sees its full functionality during the fairs. My cart table is exactly that... a cart and a table. For loading in and loading out of the Maker Faires the cart configuration provides a large cart that can usually carry everything I need in a single trip. The large heavy-duty wheels work well on any surface.

As a table it is an "L" shaped table roughly 10" long in each direction. Having a known table size sped up setup because there is less time spent trying to adapt my display to a new table. Additionally, I used to bring along extra tables and or cabinets to get my injection molder to a comfortable working height. I have a small box that raises the injection molder to the proper height while on the cart table (the box also doubles as a tote for the injection molder.)

Below is a video of my cart table being setup for Maker Faire Ozarks 2021

Injection Molding Machine

injection_molding_machine.jpg

There is an entire web page dedicated to the injection molding machine.
That web page can be found here:
Home Plastic Injection Molding

Gingery Lathe

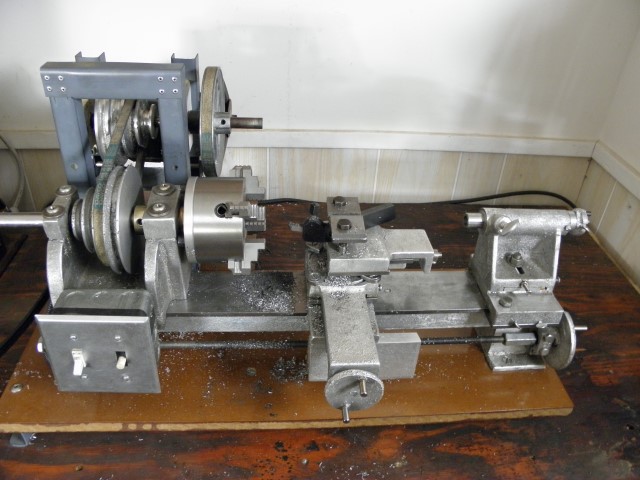
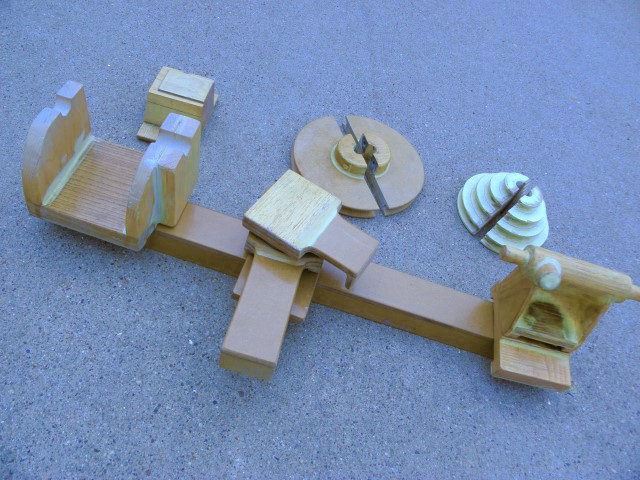
A Gingery Lathe made based on the book "The Metal Lathe" by David Gingery. My lathe is by no means perfect but it is an example of a functioning lathe that I continue to use. The picture on the right shows wood patterns used to make the sand molds arranged roughly as they appear on the lathe.

lathe_1.jpg lathe_3.jpg

I walk through the process of casting aluminum at home with minimal tool in on my One Day Foundry - For Casting Aluminum web page and the accompanying video.


In this video the lathe can be seen making some of the parts for my injection molding machine:

70 Amp MOT Stick Welder

welder_1.jpg welder_3.jpg

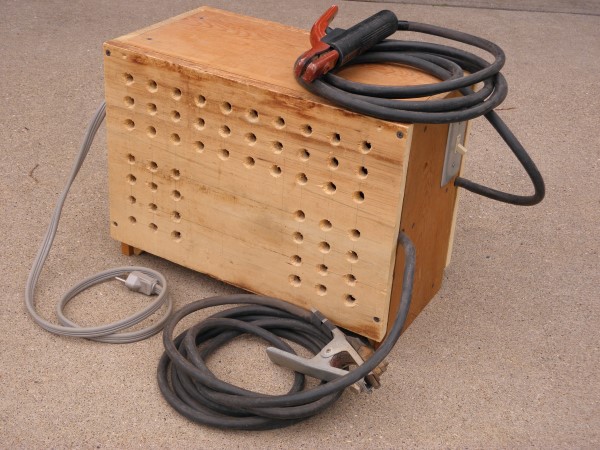
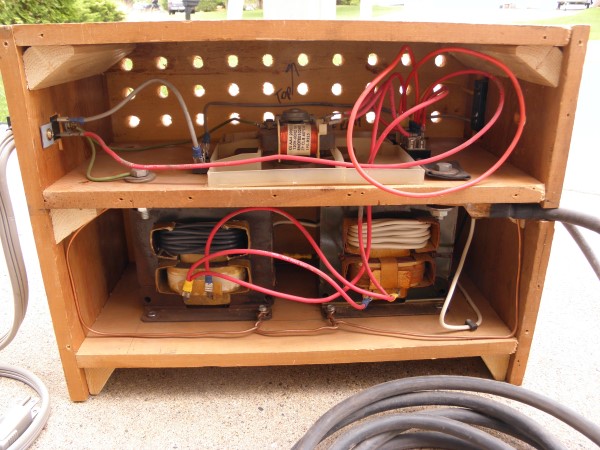
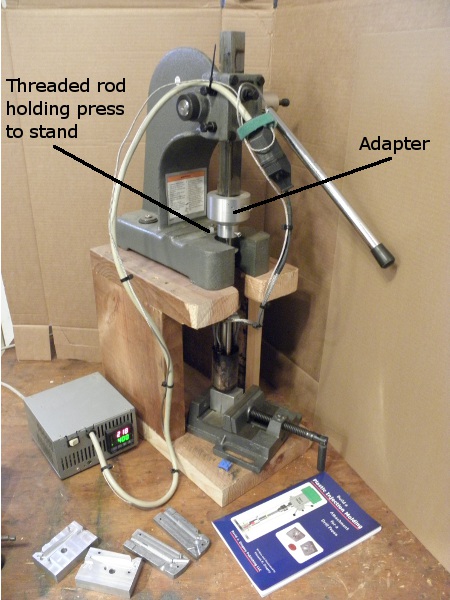
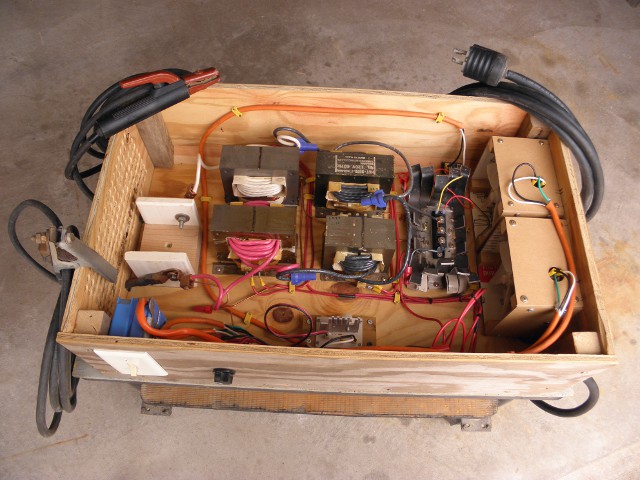
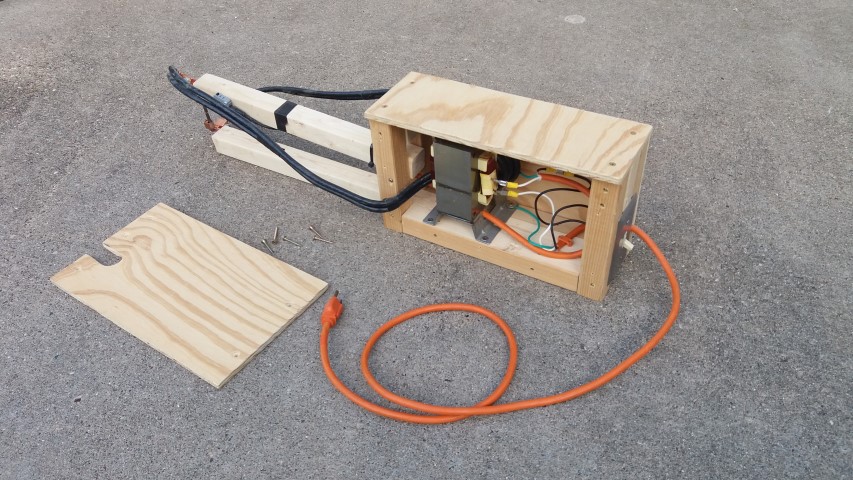
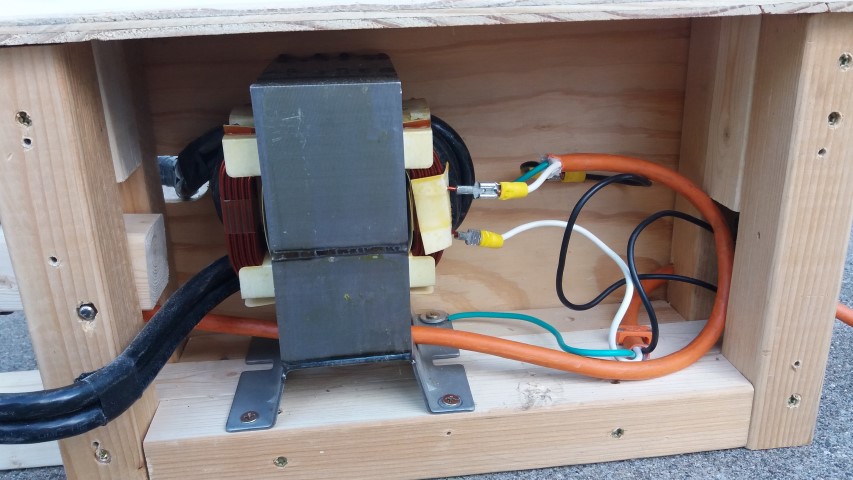
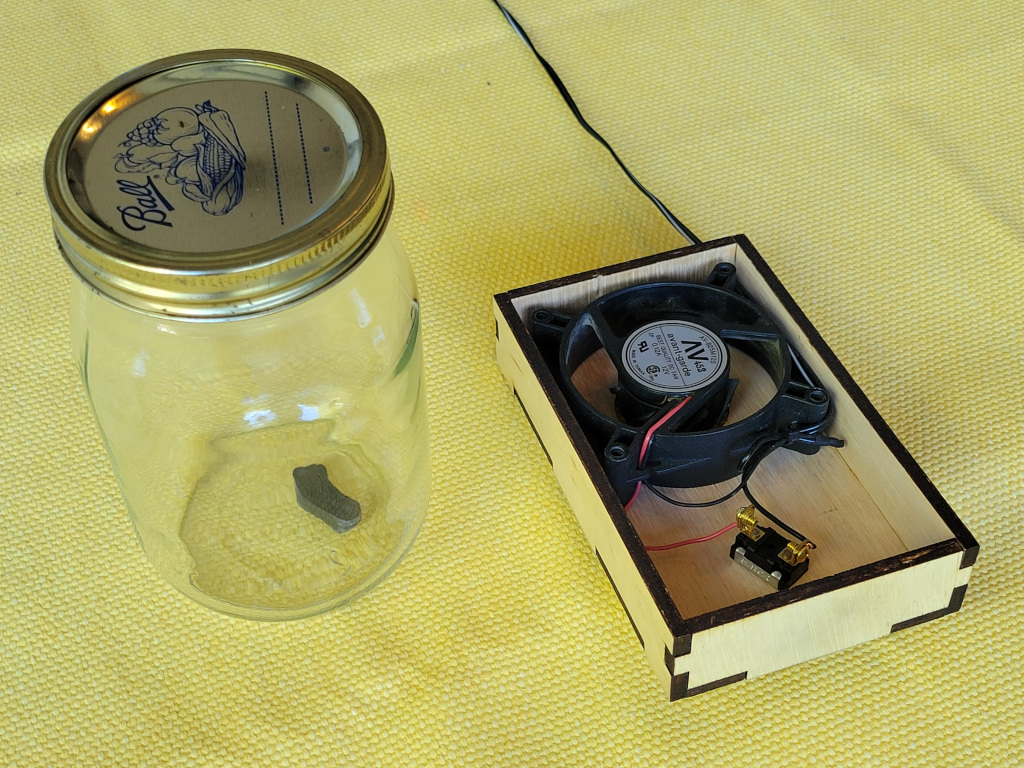
Home-made Microwave Oven Transformer (MOT) stick welder. I based my design on the welder by Randy Gross (Homemade 70-Amp Arc Welder). It looks like Randy's web site is gone now but my welder lives on. This welder is made from two transformers from old microwave ovens. The transformer secondary coils were rewound, to achieve welding voltage, with 10 AWG solid copper wire. I included a fan from one of the microwaves for cooling.

Here is a link to an archive of the original AAA Welder web page that I used as a guide to construct this welder. Build A 70 Amp Arc Welder

Input: 120V, 20 Amp
Open circuit voltage: 40 Volts
Welding current: 73 Amps
Rewound transformer secondary coils with 10 AWG solid copper wire.
Welds best with 5/64 welding rod

170 Amp MOT Stick Welder (too big to bring to Maker Faires)

170amp_welder_1.jpg 170amp_welder_2.jpg
Home-made Microwave Oven Transformer (MOT) stick welder. I based my design on the welder by Daniel B. Hartman (Dan's Workshop). This welder is made from four transformers from old microwave ovens. The transformer secondary coils were rewound, to achieve welding voltage, with 6 AWG solid copper wire. I included two fans from one of the microwaves for cooling. The power adjustable so it can be used with various sized of welding rod. The SCR module used to adjust the power is mounded to a homemade heat sink made from two old aluminum frying pans.

Input: 240V, ~25 Amp
Open circuit voltage: 47 Volts
Welding current: 170 Amps
Rewound transformer secondary coils with 6 AWG stranded copper wire.
Variable power provided via SCR module

Spot Welder

spot_welder_1.jpg spot_welder_2.jpg

This is a spot welder I made from a transformer from a microwave oven. It was made by removing the secondary from the transformer and replacing it with two 2 AWG (stranded) wires coiled in parallel. I didn't have access to thicker wire so I used two 2 AWG wires in parallel. It would have been better to use one length of thicker wire. The open circuit voltage is 2V and the operating current is 800 Amps. It is not very powerful but I like how it turned out. It is actually very usable for very light work. The bird cage guard project in the video is really is pushing the limits of this little machine. My welder was made heavily based on the welder that Grant Thompson ("The King of Random" on YouTube) made.

String Shooters

I have made a variety of string shooters over time. The large string shooter I bring to Makers Faires is powered by an old bread making machine motor. The motor is 1750 RPM and the outer diameter of the driving wheel is about 6 inches. So doing a little math you can calculate the string is being propelled at about 32 miles per hour on that particular string shooter. I don't have any plans for the large string shooter but below there are links to design files which include the specific yarn that I use in my string shooters. The string/yarn makes a big difference in how the string shooters perform. The density/fluffiness of the string affects how long the string hangs in the air. Strings that are more dense droop very quickly. There is a really interesting Video by The Action Lab showing a string shooter in a vacuum.

large_shooter_1.jpg

String Shooter (Thingiverse)


Small String Shooter (Thingiverse)
small_shooter_1.jpg

Micro String Shooter (Thingiverse)
micro_shooter_1.jpg

Floating Ball

This is a classic demonstration of the Coanda effect this Bruce Yeany Video shows Bruce having fun trying to levitate various items. There is also a description of the principal included in the video.

floating_ball_1.jpg

Vortex in a Jar

This is a simple Magnetic Stirrer made from an old computer case fan and a few magnets. Two magnets are glued to the fan hub, and the fan blades are broken off of the computer case fan so the motor will spin faster. Inside the jar full of water is a 3D printed plastic bar with two magnets embedded inside. When the fan motor spins, the magnets in the jar also spin creating a vortex.
Vortex in a Jar Video vortex_2.jpg
Vortex in a Jar Video (From Chad From ManCrafting)

Air Powered Top Demo

This is a larger scale demo showing how air blowing down on the large air powered starts the top spinning. The video embedded below talks about the air powered tops and how they can be made by 3D printing.

Multiple Gearing

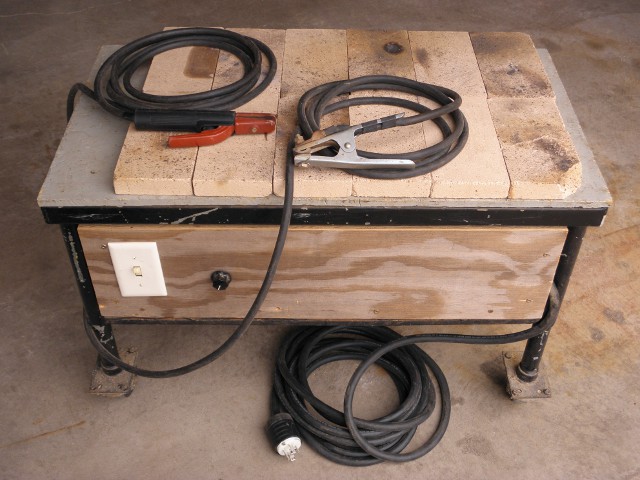
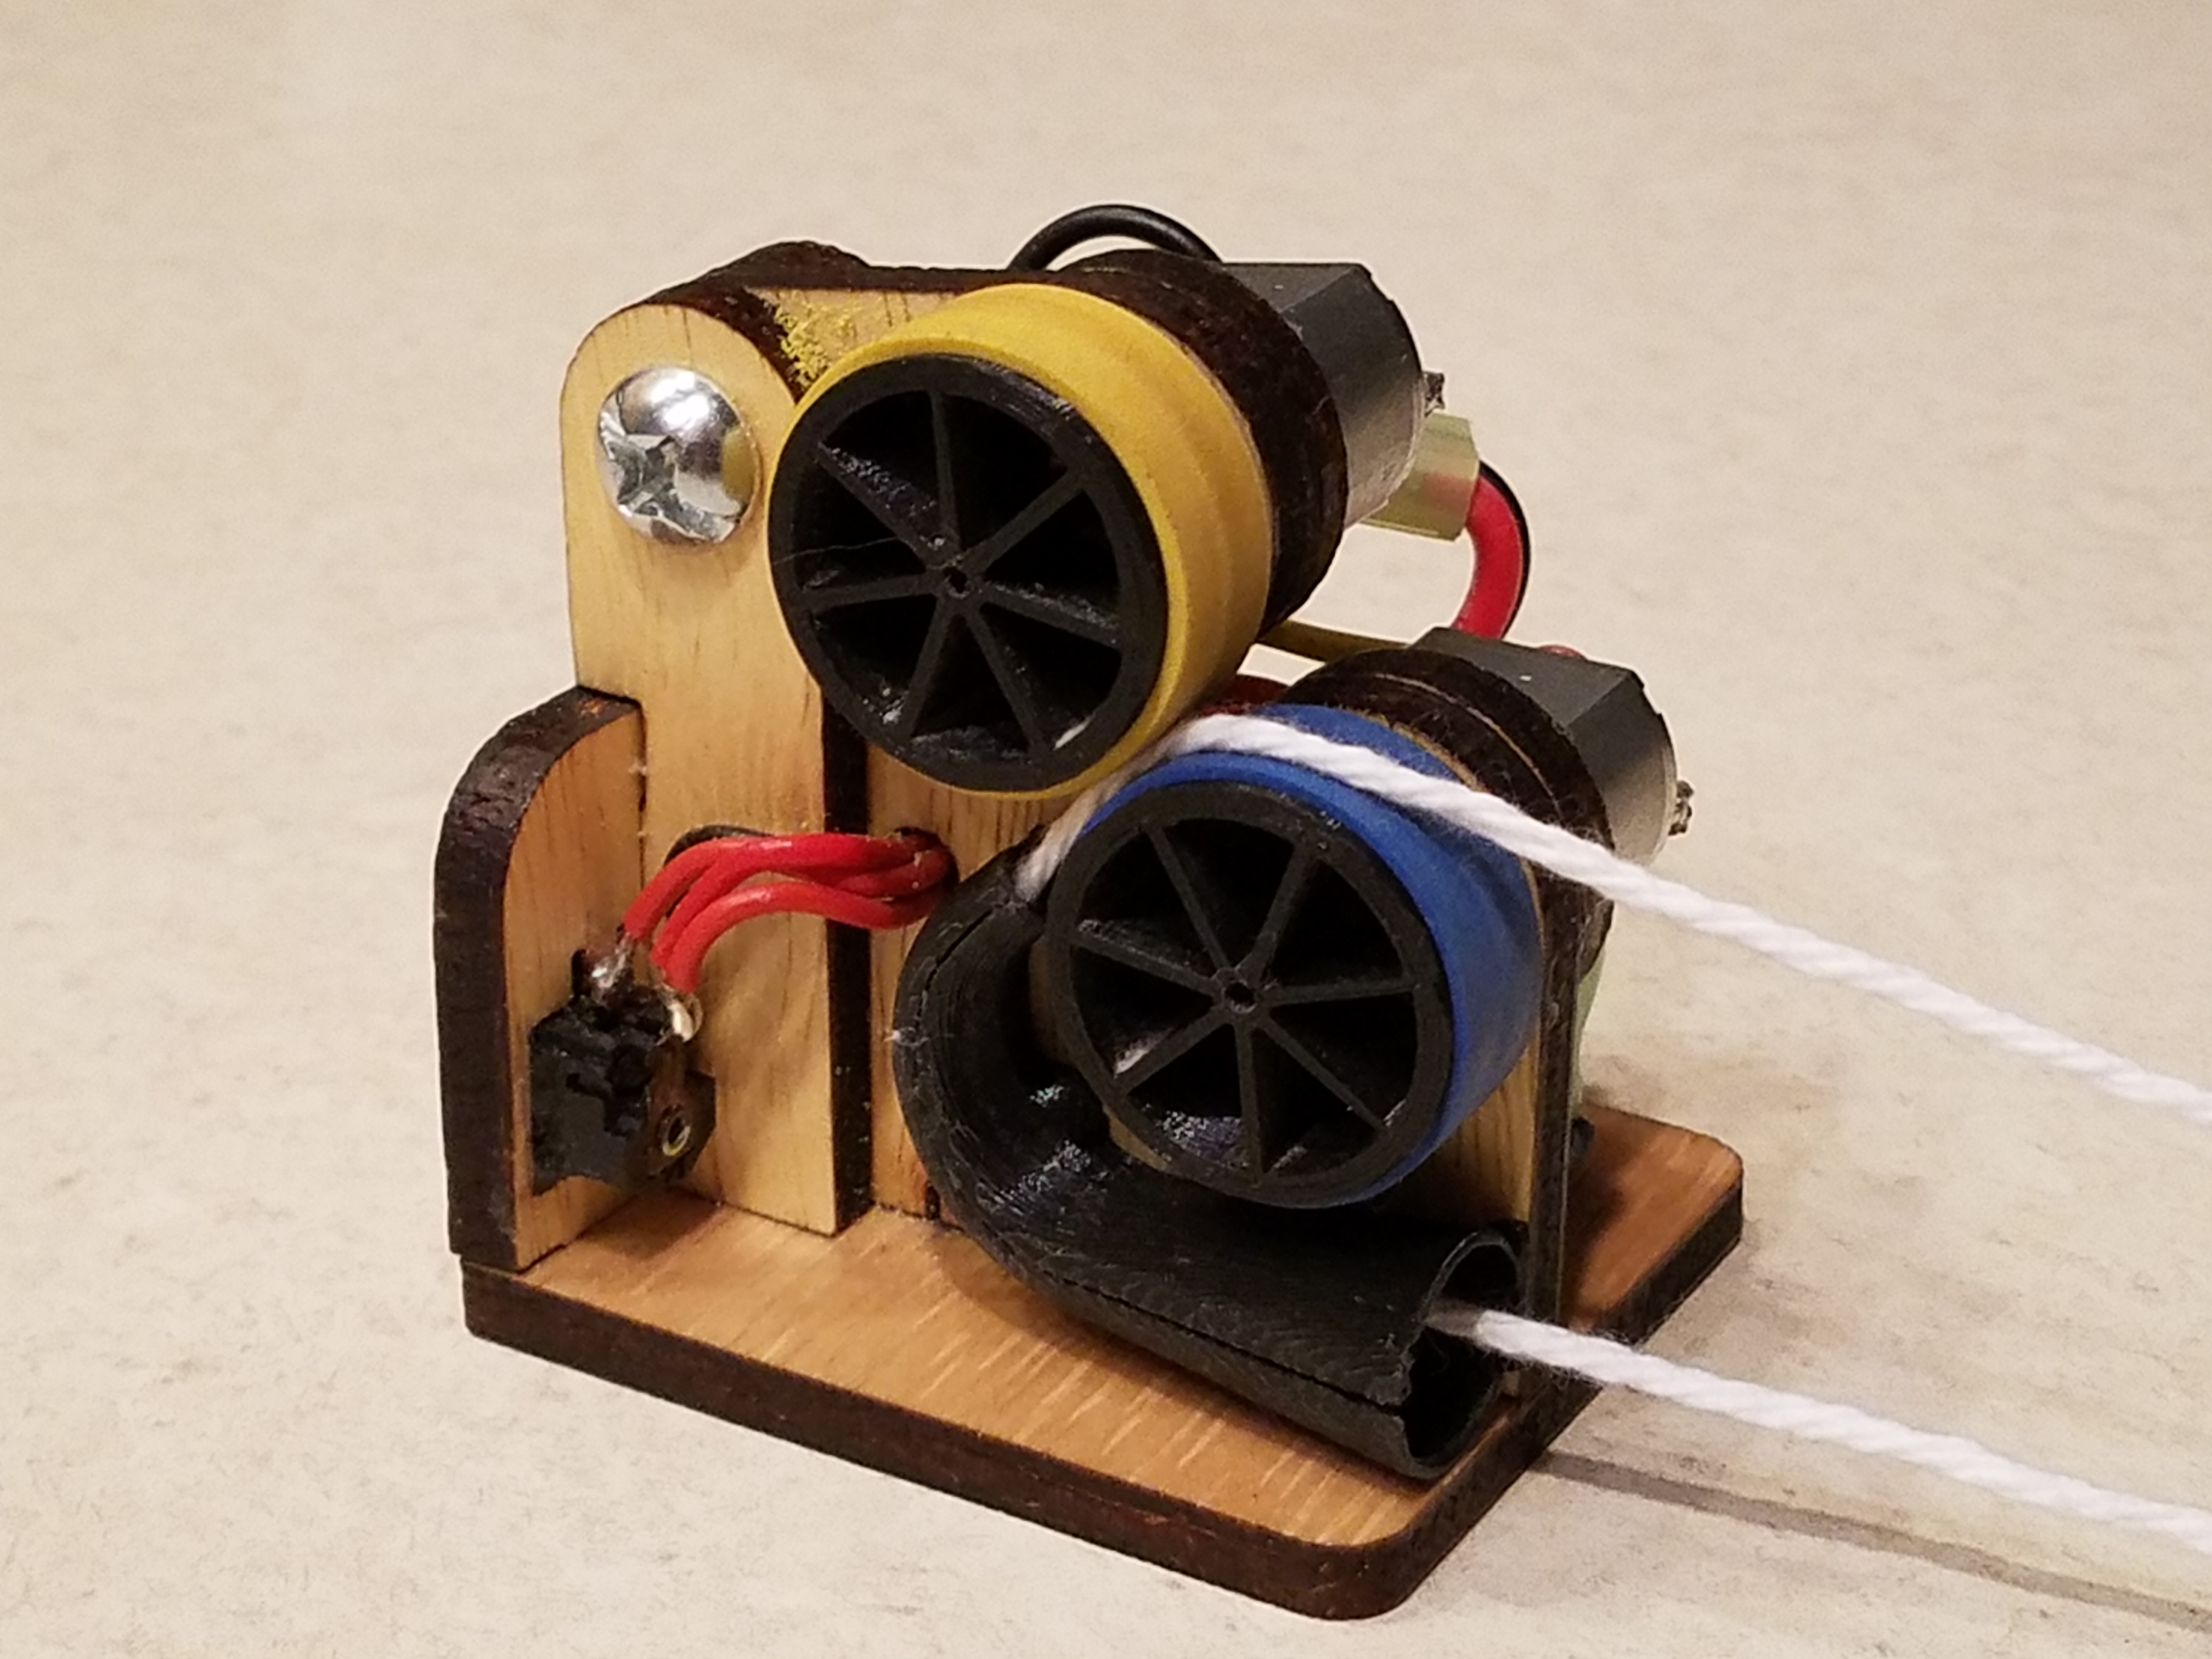
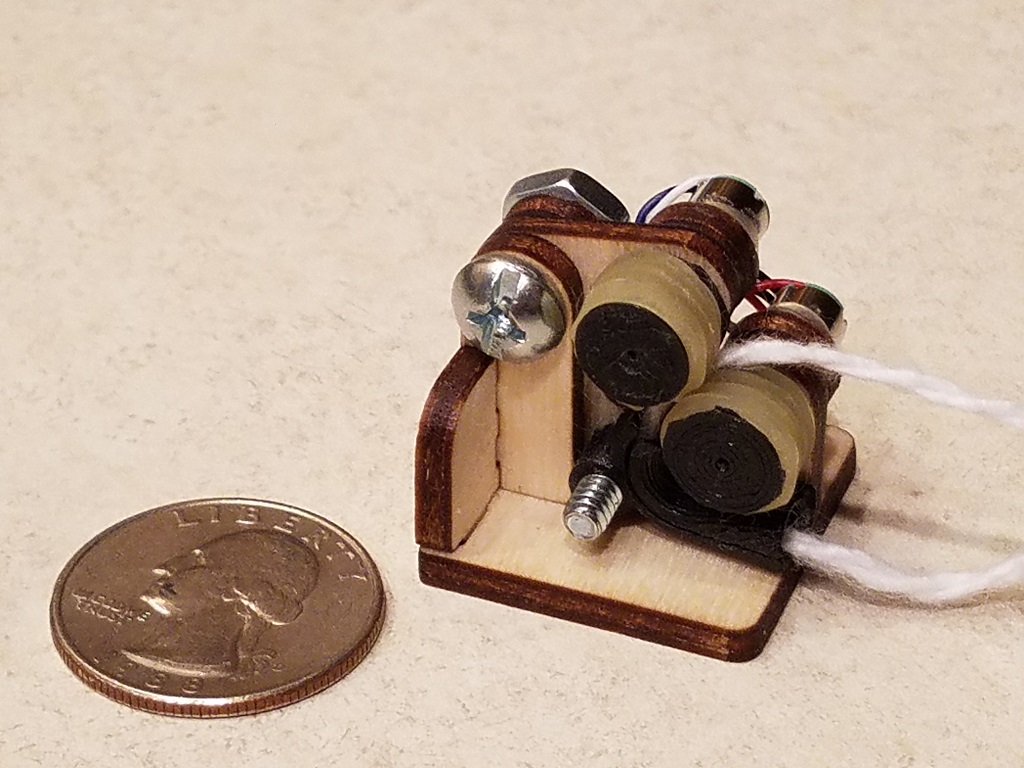
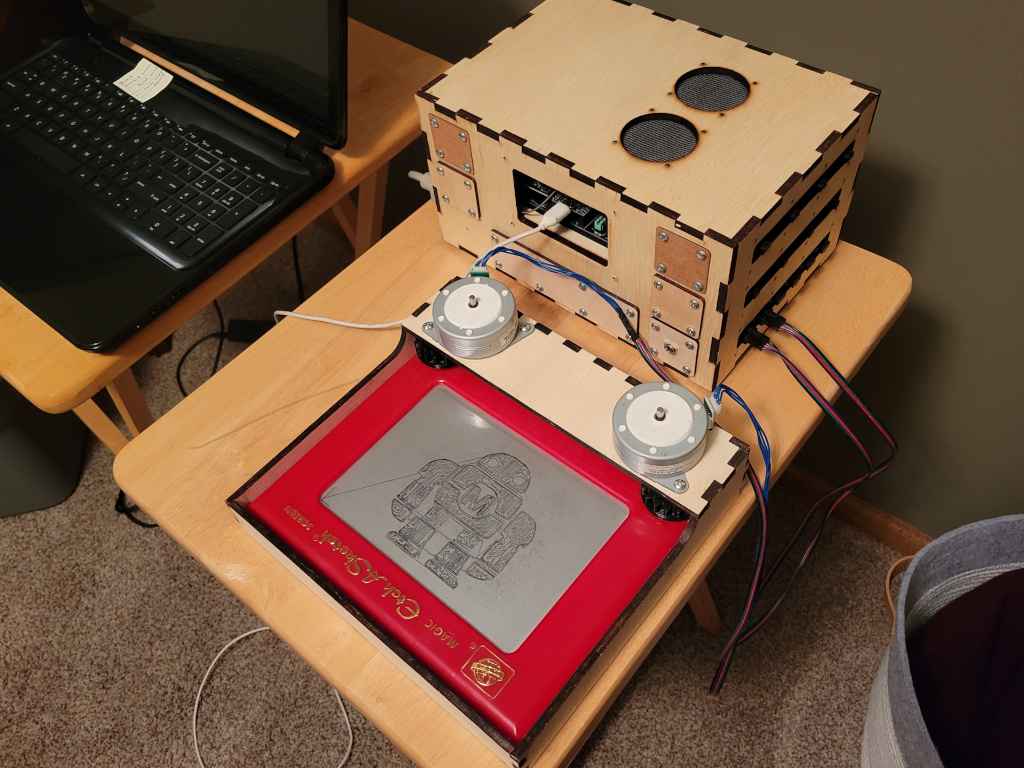
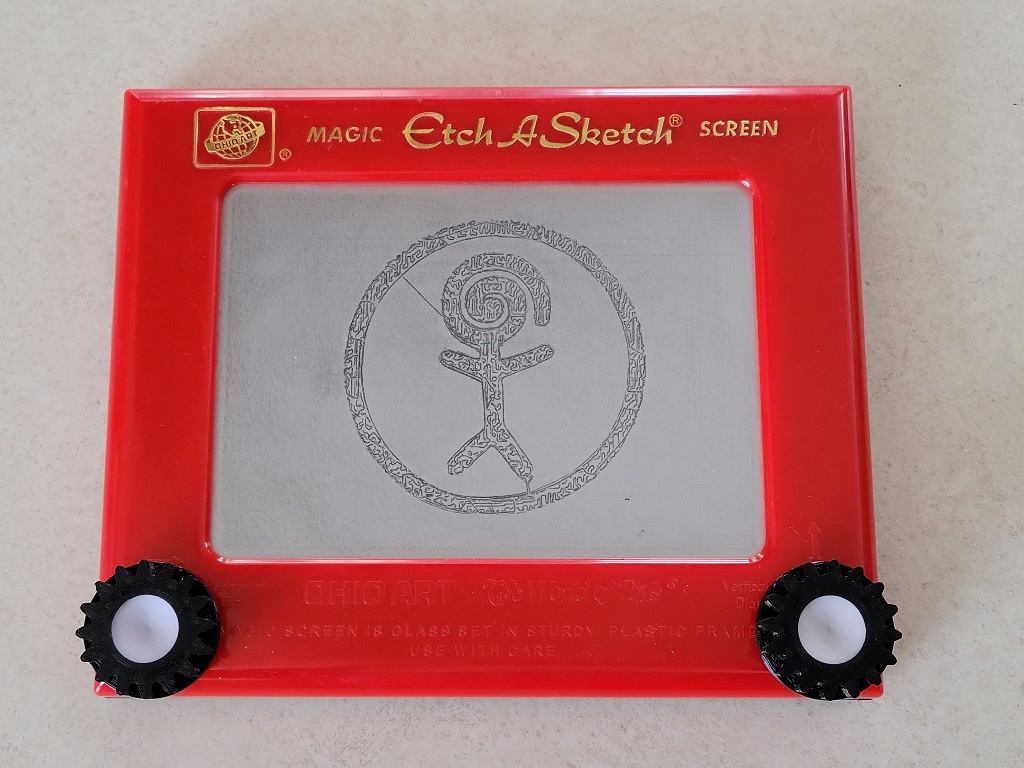
These are models of a mechanism I have seen a couple of times. The mechanism also appears in the book "Five Hundred and Seven Mechanical Movements". In the book it is listed as #027 and called "Multiple Gearing".

The design was created in OpenSCAD. The OpenSCAD model is parameterized so that the number of arms on the small wheel can be changed easily. I have included SVG files for laser cutting models with 2,3,4,5 and 6 arms. the other parts are common between the designs.

Full design files and additional information can be found on Thingiverse:
Multiple Gearing Model (Thingiverse)

Battle Bots Top Arena

The mini battlebots arena is used with the injection molded Makey robots. Below is a corny video of the arena in action. At the end of the video there is fast motion video of the arena being built. The main floor started as an old baking sheet.

Nerf Bullet Speed Trap

The Nerf bullet speed trap was my son's project to measure the speed of Nerf darts being shot from Nerf guns that he was modifying for better performance. There are two pairs of lights and sensors inside the tube. The sensors detect when the light is interrupted as the Nerf bullet passes through. The distance between the sensors is known so given the measured time between light interruptions the speed of the Nerf bullet can be calculated and displayed on the LCD screen.
speedtrap_1.jpg


A bit of an Easter egg at my booth is the large medical book under the Nerf Bullet Speed Trap. If you ask me about the speed trap, I will demonstrate how it works by firing a Nerf dart through the device using the 3D printed Nerf gun that is stored inside book. The design for the 3D printed gun can be found on Thingiverse
LF1 - Foam Dart Blaster (NERF Compatible).

Computer Numerically Controlled (CNC) Etch-A-Sketch

cnc_etch-a-sketch.jpg etch-a-sketch_1.jpg
My CNC Etch-A-Sketch uses g-code generated by a program I put together specifically for generating Etch-A-Sketch designs. The program still needs work. Eventually I plane to release it as a new program with a graphic user interface for making Etch-A-Sketch designs. One of the most important aspects of the code is including backlash compensation. Without some kind of backlash compensation, the deigns do not look good at all. My current setup is running FluinNC as the control software on a Six Pack CNC controller. This is overkill for this little Etch-A-Sketch but I use the same controller for some other small projects also.

CD Spinner


My CD spinner is a high-speed spinner for CD/DVDs. The spinner is in a fully enclosed box which is good because somewhere between 30,000 and 40,000 RPM the CD will tear itself apart into many small pieces. Generally speaking, if you spin anything fast enough it will break apart violently. In the case of CDs this machine can get up the critical speed. Here is a
Slo Mo Guys video on the topic of spinning CDs.